
How to Tailor Jeans for a Small Waist and Curvy Hips
Quick Summary
To tailor jeans for a small waist and curvy hips, first measure the gap at the back waistband, then take in the center-back seam for gaps under 2 inches. Test the fit by sitting and bending before cutting. Larger gaps may need a side-seam take-in or a professional tailor.
- Measure the gap at the center back and each side before cutting any fabric.
- For gaps under 1 inch, use back darts or a no-sew fix.
- For gaps of 1 to 2 inches, a center-back waistband take-in is the most reliable permanent fix.
- Gaps over 2 inches usually need a side-seam take-in or professional tailoring.
- Test the fit while sitting and bending, not only standing still.
Table of Contents
- Why Jeans Gap at the Waist on Curvy Hips
- Deciding How Much Alteration Your Jeans Need
- How to Take In Jeans at the Waist Without Sewing
- How to Take In the Waist of Jeans With a Sewing Machine
- How to Take In Jeans at the Side Seam Without Hurting the Hips
- How to Make Jeans Smaller in the Waist and Hips Together
- Pick the Right Fit for Your Next Pair of Jeans
- Frequently Asked Questions
Why Jeans Gap at the Waist on Curvy Hips
Last Updated: November 8, 2026
If your jeans gap at the back of the waist but fit your hips, you are not alone. Many women with a small waist and curvy hips run into this problem. The fix is usually a tailoring change, not a new size. This guide walks through how to tailor jeans for a small waist and curvy hips step by step.
The cause is simple. Jeans are cut to fit the hip first, then the waist is sized to match. The result is gapping at the back and sometimes at the sides. Learn more about why jeans gap at the waist and how to stop it.
Diagnosing Your Fit Before You Cut Anything
Before you make any changes, check where the problem is. Put the jeans on, button them, and stand in front of a mirror.
Look for these signs:
- Gaping at the back waistband: The waistband pulls away from your back when you bend or sit.
- Pulling across the hips: The fabric stretches tight over your hip bones.
- Bunching at the side seams: Extra fabric folds near your waist.
- Loose legs but snug seat: The rise is correct, but the waist is too wide.
Each sign points to a different fix. See which fits suit different body shapes. A gap at the back usually needs a center-back waistband change. Bunching at the sides often means the side seam needs taking in.
Check the fit while sitting and bending, not only standing still. Jeans that look fine on a hanger often gap once you move.
Deciding How Much Alteration Your Jeans Need
Not every pair should be altered, and the method you choose should follow the amount and location of the excess fabric. Measure before you commit. Button the jeans, stand naturally, and slide a tape measure into the back gap at the waistband.
Use the gap measurement to narrow the method:
- Under 1 inch of gap: A center-back take-in of about 1/2 inch per side, a pair of back darts, or a temporary no-sew fix will usually close the gap without disturbing the yoke.
- 1 to 2 inches of gap: A center-back waistband take-in is the most reliable permanent fix. Back darts can work if the gap is concentrated at the center back and the waistband is not heavily topstitched.
- Over 2 inches of gap: Altering this much at the center back pulls the back pockets toward each other and distorts the yoke. A side-seam take-in combined with a center-back adjustment, or a different size or cut, is usually the better path.
Compare the four common methods before you cut:
- Center-back take-in: Best for a gap that is widest at the center back and tapers toward the sides. It preserves the hip curve because you remove fabric only at the back seam. It is unsuitable when the waistband has a continuous decorative topstitch you cannot replicate, or when the gap exceeds about 2 inches.
- Back darts: Two short vertical darts placed 3 to 4 inches apart on either side of the center back seam can remove 1/2 to 1 inch total. Darts are unsuitable on jeans with a prominent yoke seam or back pockets positioned close to the center, because the dart can cross the pocket or pull the yoke out of shape.
- Side-seam take-in: Best when the gap appears at the sides or when the waist and high hip both need reduction. Taper the new seam to zero by the full hip so the seat and thighs keep their room. It is unsuitable if the side seam has a flat-felled finish you cannot reproduce, or if the jeans have no seam allowance to work with.
- Professional tailoring: Worth considering for gaps over 2 inches, for heavyweight selvedge denim, or for jeans with rivets, chain stitching, or a waistband you want to keep intact. A tailor can open the yoke, reshape it, and reattach the waistband, which is difficult to do cleanly at home.
A common pattern is to start with the least invasive method and test the fit before removing more fabric. Watch out: taking in the center back without checking the high hip can make the jeans pull across the seat even though the waistband now fits.
The best method depends on how much fabric needs to go and where the gap sits.
| Method | Best for | Key difference |
|---|---|---|
| Center-back take-in | Gap widest at center back | Preserves hip curve; avoid if gap over 2 inches |
| Back darts | Gap under 1 inch | Two darts remove 1/2 to 1 inch total |
| Side-seam take-in | Gap at the sides | Taper to zero by full hip |
| Professional tailoring | Gaps over 2 inches or heavyweight denim | Tailor can reshape yoke and reattach waistband |
How to Take In Jeans at the Waist Without Sewing
If you do not sew, you can still get a better fit. These methods are temporary, but they work well for small gaps.
- Use a belt: A slim belt pulls the waistband in at the back and hides a small gap.
- Add a waist-tightening clip: Small clips on the inside of the waistband can hold the fabric close.
- Try fabric tape: Double-sided fashion tape can hold the waistband in place for a day.
These options are not permanent. For a lasting fit, sewing is the better choice.
How to Take In the Waist of Jeans With a Sewing Machine
Sewing gives the cleanest permanent result, but denim punishes guesswork. Gather a sewing machine, a denim needle (size 90/14 or 100/16 for midweight denim, 110/16 for heavyweight), heavy-duty polyester thread such as a 40-weight or upholstery-weight thread, sharp pins or clips, tailor's chalk, a seam ripper, a tape measure, and a walking foot if your machine has one. A denim needle is important because it has a reinforced point that pushes through the weave instead of deflecting off it.
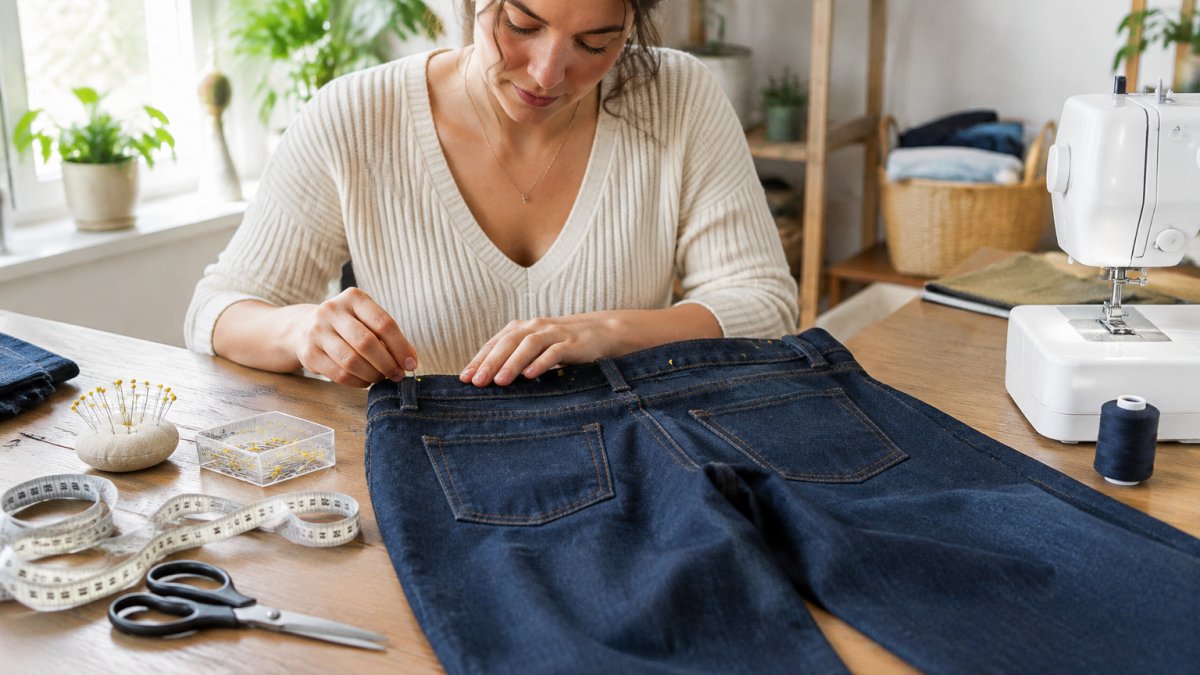
!Woman at a home sewing table pinning the back waistband of dark wash jeans
Pinning and Marking Excess Fabric
Put the jeans on inside out and button them. Pinch the excess at the center back until the gap closes, then pin along that fold from the top of the waistband down to the yoke seam. Stop at the yoke; do not pin into the yoke unless you plan to reshape it.
Before sewing, measure the flat waistband across the back and subtract the amount you plan to remove. Compare that number to half your natural waist measurement plus 1/2 inch of ease. That checkpoint tells you whether the take-in will actually close the gap before you commit.
Taking In the Center-Back Waistband
If the take-in stays below the waistband, sew a new seam along the chalk line from the yoke up to the base of the waistband, backstitching at both ends. If the take-in must pass through the waistband itself, remove the waistband with a seam ripper, sew the new center-back seam, trim the excess to about 1/2 inch, and finish the raw edges with a zigzag stitch or a serger.
Watch out: sewing through the waistband, belt loop, and yoke all at once can snap a needle or bend the presser foot. Sew those layers in stages and use the handwheel to walk the needle through the thickest intersections.
Checking the Fit and Preserving the Construction
Try the jeans on before you trim any fabric. Sit, bend, and squat. The waistband should stay against your back without pulling the side seams forward. Check that the back pockets have not moved closer than about 4 inches apart at their inner edges; if they have, you removed too much at the center back.
Finish the seam allowance so it does not fray in the wash, press the seam open or to one side, and re-topstitch any line you opened. Matching the original topstitch length and thread color is what makes the alteration look intentional rather than visibly modified.
How to Take In Jeans at the Side Seam Without Hurting the Hips
Sometimes the waist fits, but the sides still bunch. A side-seam take-in is one option. Take in a small amount along each side seam, starting at the waistband and tapering to nothing at the hip.
Tapering matters. If you take in straight down, the hips can feel tight. A gradual taper keeps the jeans comfortable through the hip and thigh.
Work in small steps. Take in about a quarter inch per side, then try the jeans on again.
How to Make Jeans Smaller in the Waist and Hips Together
Some jeans need changes at both the waist and the hips. This is more advanced, so take your time.
Start with the waist, as described above. Then check the hips. If the hips feel tight after the waist change, let out the side seam a little. Letting out a seam only works if there is seam allowance to spare, so check the inside before you cut.
Denim does not stretch back once it is cut. If you take in too much, the fabric cannot be let back out. Make small changes and try the jeans on often.
Pick the Right Fit for Your Next Pair of Jeans
Tailoring can fix many fit problems, but the best fit starts with the right cut. Look for high-rise or mid-rise styles with a stretch blend if you have a small waist and curvy hips. These styles give room in the hips and hold the waist in place.
Our High-Waisted Wide Leg Jeans are made for this kind of shape. You can find a pair that already fits a small waist with curvy hips and skip the alterations entirely.

If you prefer to alter a pair you already own, read our no-sew waistband fix for a temporary solution, or follow the sewing machine method for high-waisted jeans for a lasting one.
Frequently Asked Questions
How do I tailor jeans for a smaller waist?
Start by checking the gap at the back of the waistband while you wear the jeans and the hips fit comfortably. If the gap is small, a few millimeters can often be removed by taking in the center-back seam or the waistband. Pin the excess fabric while wearing the jeans, mark it with chalk, then sew a new line. Avoid taking in the hips too much, since that can cause pulling and wear. If the gap is large, a tailor may need to remove and reattach the waistband instead.
Can you take in jeans at the waist without sewing?
Yes, but the results are usually temporary. Options include a waistband tightener clip, a belt worn under a tucked-in top, or fabric tape applied to the inside of the waistband. These methods help with a loose waist but do not change how the jeans fit over the hips. For a lasting change, a sewing machine or a tailor is the better choice, since no-sew fixes can slip or shift during wear.
Is it better to take in jeans at the center back or the side seams?
For a small waist with curvy hips, the center back is usually the better place to start because it removes the gap at the waistband without changing the width at the hips. Side seams affect the whole leg and hip area, so they are better for narrowing the overall fit rather than fixing only the waist. Many people combine both, taking in a small amount at the center back and adjusting the side seams only if the leg still feels loose.
What is the two-finger rule for jeans?
The two-finger rule is a quick fit check for the waistband. With the jeans buttoned, you should be able to slide two fingers between your waist and the waistband without strain. A tighter fit can feel uncomfortable and sit poorly over the hips. Use this check before you alter the jeans, and recheck it after each adjustment so the waistband does not end up too snug.
